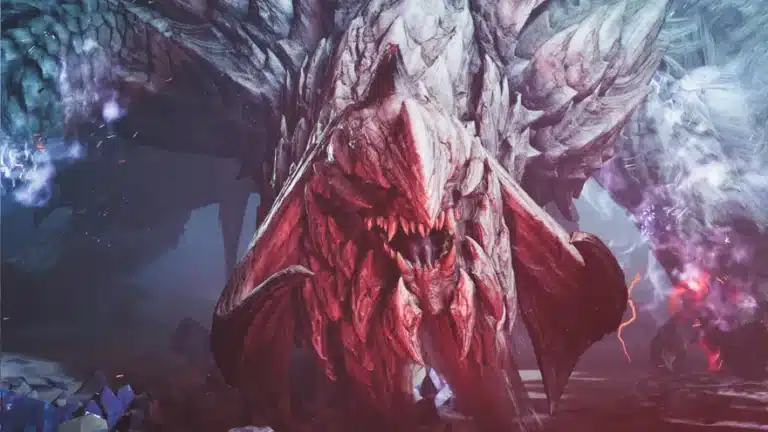
Monster Hunter Wilds is set to revolutionize the hunting experience with its vast open world, dynamic ecosystems, and an arsenal of powerful weapons. Whether you’re a seasoned hunter or a newcomer to the franchise, mastering the weapons, combos, and advanced techniques is key to taking down the fiercest monsters. With a variety of weapon types, each offering unique playstyles and strategic depth, understanding their strengths, weaknesses, and optimal combos can make all the difference in battle.
In this ultimate guide, we’ll break down everything you need to know about Monster Hunter Wilds’ weapons—covering their mechanics, best combos, advanced techniques, and the most effective strategies to maximize your hunts. From devastating greatsword strikes to lightning-fast dual blade assaults, this guide will help you choose the best weapon for your playstyle and dominate the wilds like never before.
🎮 Level Up Your Game with Our Patreon! 🎮
- 📚 Early Access to Full Guides: Get personalized guides for your favorite games before anyone else.
- 🔍 Exclusive Analyses: Deep dives into top teams and game strategies just for you.
- 🏆 Join Tournaments: Compete in tournaments with cash prizes and exclusive in-game items.
- 💥 Be the First: Access the latest news and updates in the gaming world.
👉 Don’t miss out—join our Patreon today and become the ultimate gamer!

Great Sword
Introduction
In Monster Hunter Wilds The Great Sword has been a staple weapon in the Monster Hunter franchise, known for its raw power and devastating charged attacks. While it remains a high-damage weapon, its slow wind-up and reliance on precise timing make it a challenging choice for newcomers. In Monster Hunter Wilds, the Great Sword has undergone some key changes, introducing new mechanics like Focus Mode, Offset Rising Slash, and Perfect Guards. This guide will help both new and veteran players understand the weapon’s capabilities, new features, and strategies for optimal use.
Strengths and Weaknesses
Strengths:
- Highest single-hit damage in the game.
- New Focus Mode allows better aiming and maneuvering mid-swing.
- Tackle mechanics improved for better counterplay.
- Offset Rising Slash adds a counter-attack capability.
- Perfect Guards mitigate damage and set up powerful follow-ups.
- Strong severing potential, especially for cutting tails.
Weaknesses:
- Slow attack speed makes it hard to land hits without proper positioning.
- Long wind-up time requires precise timing and monster knowledge.
- High commitment to attacks, making dodging and repositioning difficult.
- Limited mobility, requiring strategic sheathing and movement.
Basic Combos
True Charged Slash Combo
The staple of Great Sword combat, this attack consists of three charged slashes, dealing massive damage.
- How to Perform: Hold Y (Xbox) / Triangle (PlayStation) until fully charged, then release. Repeat twice.
- Key Features:
- Maximum damage potential.
- Long wind-up time.
- Works best when the monster is knocked down or stationary.
- Maximum damage potential.
Forward Lunging Attack Combo
A mobility tool that helps close the distance with the monster.
- How to Perform: Press B B B (Xbox) / Circle Circle Circle (PlayStation).
- Key Features:
- Helps maintain offensive pressure.
- Good for repositioning and dodging attacks.
- Lower damage compared to charged attacks.
- Helps maintain offensive pressure.
Tackle and Perfect Tackle
Tackle has always been a core mechanic of the Great Sword but has been improved in Wilds.
- How to Perform: Press B (Xbox) / Circle (PlayStation) during a charge.
- Perfect Tackle: If timed correctly with a monster’s attack, the charge level is maintained for a powerful follow-up.
- Key Features:
- Grants hyper armor, preventing interruptions.
- Allows quicker transitions to True Charged Slash.
- Requires precise timing but rewards skilled players.
- Grants hyper armor, preventing interruptions.
Stationary Combo
A straightforward set of attacks used mainly for transitions.
- How to Perform: Press B B+Y B+Y (Xbox) / Circle Circle+Triangle Circle Circle+Triangle (PlayStation).
- Key Features:
- Can combo into Offset Rising Slash.
- Works best against stationary monsters.
- Can combo into Offset Rising Slash.
Advanced Techniques
Offset Rising Slash
A powerful counterattack that topples monsters if timed correctly.
- How to Perform: Press Y+B (Xbox) / Triangle+Circle (PlayStation) when a monster attacks.
- Key Features:
- Functions as a counter, opening the monster for heavy damage.
- Can be followed up with True Charged Slash.
- Diminishing returns on monster topples, requiring more hits over time.
- Functions as a counter, opening the monster for heavy damage.
Perfect Guard and Power Clashes
In Wilds, the Great Sword can block attacks with Perfect Guard.
- How to Perform: Press Right Trigger (Xbox) / R2 (PlayStation) with perfect timing.
- Key Features:
- Reduces damage and sets up Power Clashes.
- Holding the guard button after a successful Perfect Guard increases Power Clash frequency.
- Can be followed by a True Charged Slash.
- Reduces damage and sets up Power Clashes.
Mounted Attacks and Focus Mode
With Wilds’ new mounting mechanics, Great Sword users gain additional airborne attack options.
- Plunging Attack: R Trigger (Xbox) / R2 (PlayStation) when in the air.
- Jumping Charge Slash: Hold Y (Xbox) / Triangle (PlayStation) while airborne.
- Focus Mode Perforate Attack: RB (Xbox) / R1 (PlayStation) in Focus Mode.
- Key Features:
- Mounted attacks help set up powerful finishers.
- Perforate Attack bursts multiple wound points, increasing damage.
- Perfect for maximizing True Charged Slash opportunities.
- Mounted attacks help set up powerful finishers.
Combat Tips
- Master Monster Patterns: Understanding when a monster is vulnerable is key to landing True Charged Slashes.
- Use Tackle Efficiently: Incorporate Tackles to maintain charge levels and avoid interruptions.
- Sheathe Between Attacks: Great Sword is slow; unsheathing only when needed helps with mobility.
- Prioritize Weak Spots: Aim for heads, tails, and breakable parts for maximum damage.
- Utilize Perfect Guards: Blocking at the right time can set up devastating counterattacks.
Weapon Synergy & Secondary Weapons
Best Secondary Weapons:
- Hammer: Complements the Great Sword with blunt damage for stunning monsters.
- Light Bowgun: Quickly applies status effects before switching to the Great Sword.
- Hunting Horn: Buffs attack and defense, making Great Sword even more effective.
Long Sword
Introduction
In Monster Hunter Wilds The Long Sword is one of the 14 weapon types in Monster Hunter Wilds, and it remains a fan-favorite due to its stylish, samurai-like aesthetics, excellent mobility, and deep yet accessible combo system. Whether you’re a new player trying out Monster Hunter Wilds for the first time or a veteran looking to master the latest changes, this guide will provide everything you need to know about the Long Sword, including its mechanics, combos, special moves, and advanced strategies.
Overview of the Long Sword
- Weapon Type: Slashing
- Mobility: High
- Combo Complexity: Moderate
- Best For: Players who enjoy fluid combat with a balance of speed and power
- Weaknesses: Requires precise timing and awareness to maximize its effectiveness
The Long Sword excels at chaining together fluid attacks while managing its Spirit Gauge, which increases its power as it levels up. Mastering this weapon requires understanding its Spirit Gauge mechanics and the new abilities introduced in Monster Hunter Wilds.
Spirit Gauge System
The Spirit Gauge is the core mechanic of the Long Sword, allowing players to level up their attacks to deal more damage. It has three levels:
- White Gauge (Base Level)
- Yellow Gauge (Intermediate Power)
- Red Gauge (Maximum Power)
In Monster Hunter Wilds, the Spirit Gauge no longer depletes with attacks. Instead, it functions on a timer, which can be extended by landing special moves. Managing this resource effectively is key to maximizing damage output.
Basic Combos and Attacks
The Long Sword has two primary combo chains, one for building Spirit Gauge and another for leveling it up.
1. Spirit Gauge Build-Up Combo
- Xbox:
Y Y Y Y - PlayStation:
Triangle Triangle Triangle Triangle - Purpose: Increases the Spirit Gauge level.
2. Spirit Level-Up Combo
- Xbox:
RT RT RT RT - PlayStation:
R2 R2 R2 R2 - Purpose: Reaches Red Gauge state, enabling access to more powerful moves.
3. Crimson Slash Combo (Red Gauge Exclusive)
- Xbox:
Y Y Y - PlayStation:
Triangle Triangle Triangle - Purpose: Delivers fast, powerful slashes for sustained DPS.
Special Moves & Advanced Techniques
1. Fade Slash (Evade Attack)
- Xbox:
Y + B - PlayStation:
Triangle + Circle - Allows you to evade backward or laterally while continuing your attack chain.
2. Foresight Slash (Counter Attack)
- Xbox:
RT + B - PlayStation:
R2 + Circle - Provides invincibility frames if timed correctly and can immediately chain into Spirit Round Slash.
3. Special Sheath & EI Spirit Slash (Quick Counter & Spirit Boost)
- Xbox:
RT + Ato Sheath, thenRTto Slash - PlayStation:
R2 + Xto Sheath, thenR2to Slash - Boosts Spirit Gauge and allows quick counters when perfectly timed.
4. Spirit Thrust & Helm Breaker (Aerial Attack Finisher)
- Xbox:
RT + Y(Thrust) →RT(Helm Breaker) - PlayStation:
R2 + Triangle(Thrust) →R2(Helm Breaker) - Deals massive damage at the cost of reducing Spirit Gauge by one level.
5. Spirit Release Slash (New Ultimate Move)
- Xbox:
RT(After Helm Breaker) - PlayStation:
R2(After Helm Breaker) - A spinning multi-hit finisher that provides hyper armor but consumes two Spirit Levels.
6. Focus Mode – Unbound Thrust
- Xbox:
RT (while in Focus Mode) - PlayStation:
R2 (while in Focus Mode) - A powerful attack that bursts wounds on monsters and levels up the Spirit Gauge.
Playstyle Tips
- Positioning: Always aim for weak spots and severable parts like tails.
- Gauge Management: Keep your Spirit Gauge at Red by using EI Spirit Slash, Foresight Slash, and Spirit Release Slash.
- Combo Flexibility: Adapt to the monster’s movements by using Fade Slash and counters.
- Matchups: If facing heavily armored monsters, pair your Long Sword with a blunt weapon like the Hammer or Hunting Horn to break armor before slashing.
- Secondary Weapon Choices: Consider using ranged weapons like the Bow or Light Bowgun to handle fast-moving or airborne monsters.
Sword and Shield
Introduction
In Monster Hunter Wilds The Sword and Shield is one of the 14 weapon types in Monster Hunter Wilds, offering a balanced mix of offense, defense, and mobility. It’s an excellent choice for new players due to its versatility, while also providing depth for veterans looking to master its full potential. This guide will cover all aspects of the Sword and Shield, including its combos, strengths, weaknesses, and strategies for maximizing effectiveness in combat.
Strengths and Weaknesses
Strengths:
- Balanced playstyle: Offers a mix of offense, defense, and agility.
- Fast attack speed: Allows for quick combos and easy repositioning.
- Item usage while unsheathed: The only weapon in the game that lets you use items without sheathing.
- Environmental interaction: Enables unique movement and attacks based on terrain.
- Access to both cutting and blunt damage: Versatile for severing tails and stunning monsters.
Weaknesses:
- Lower raw damage compared to heavy weapons: Requires strategic play to maximize damage.
- Limited reach: Must stay close to monsters, making positioning crucial.
- Perfect Guards require precise timing: While rewarding, mistakes can be punishing.
Sword and Shield Combos
1. Basic Combo
A quick series of slashes that allow movement while attacking. Great for adjusting position mid-combo.
- Input:
Y Y Y Y(Xbox) /Triangle Triangle Triangle Triangle(PlayStation)
2. Powerful Combo
Ends in one of two finishers based on the opening provided.
- Input:
B B B(Xbox) /Circle Circle Circle(PlayStation) - Finishers:
- Spinning Reaper:
Y + B(Xbox) /Triangle + Circle(PlayStation) – Fast finisher. - Charge Chop: Hold
Y + B(Xbox) / HoldTriangle + Circle(PlayStation) – Slow but high-damage finisher.
- Spinning Reaper:
3. Monster Stunning Combo
A sequence of shield bashes that can stun monsters.
- Input: Forward +
B, thenB B Y + B(Xbox) / Forward +Circle, thenCircle Circle Triangle + Circle(PlayStation)
4. Charge Slash Combo
Starts with a powerful charge and leads into finishers.
- Input: Back + Hold
B(Xbox) / Back + HoldTriangle(PlayStation) - Follow-up Finishers:
- Jumping Slash (for mounting)
- Falling Bash (for stun damage)
- Plunging Thrust:
Y + B(Xbox) /Triangle + Circle(PlayStation) – Highest damage option.
- Jumping Slash (for mounting)
5. Perfect Rush Combo
A high-risk, high-reward combo that deals massive damage if fully executed.
- Input: Back +
B, thenY Y Y(Xbox) / Back +Circle, thenTriangle Triangle Triangle(PlayStation) - Extension:
Y(Xbox) /Triangle(PlayStation) – Vaults into the air for additional follow-ups.
New Additions in Monster Hunter Wilds
Diagonal Rising Slash & Diagonal Chop
- Replaces the end of the basic combo, providing better mobility and repositioning options.
Charge Chop
- A devastating new move that swings upward and stabs downward.
- Even if slightly off target, follow-up hits will still land.
Perfect Guards & Counter Slash
- Blocking an attack at the right moment triggers a Perfect Guard, negating knockback.
- Follow up with a Counter Slash for extra damage.
Focus Strike Vital Stab
- Input:
RB(Xbox) /R1(PlayStation) while in Focus Mode. - Latches onto the monster for a follow-up Falling Slash (
Y/Triangle) or Upwards Bash (B/Circle).
Sprint Blade Attack
- Input:
B(Xbox) /Circle(PlayStation) while sprinting. - Deals multi-hit damage while dashing past the monster.
Tips for Mastering the Sword and Shield
- Learn Perfect Guard Timings: Mastering this defensive maneuver greatly enhances survivability and counterattack potential.
- Utilize Item Access: Take advantage of the ability to use items while unsheathed, especially healing and buffs.
- Positioning Matters: Move around the monster to target weak spots (tail for cutting, head for stunning).
- Adapt Combos to Openings: Use quick combos when pressured and slower, high-damage combos when the monster is vulnerable.
- Experiment with Environmental Attacks: The terrain can offer unique movement and attack opportunities.
Recommended Secondary Weapons
For Support Players: Hunting Horn
- Provides buffs while complementing the Sword and Shield’s versatility.
For Agile Hunters: Dual Blades
- Offers extreme mobility and tail-severing capabilities.
For Defensive Players: Lance
- Enhances defensive play while adding better reach.
Dual Blades
Introduction
In Monster Hunter Wilds The Dual Blades are the weapon of choice for players who prefer an aggressive playstyle and always want to stay on the offensive when hunting monsters in Monster Hunter Wilds. With the highest attack speed in the game and a relatively simple move set, they are an excellent choice for newcomers while still offering depth for veteran players.
In this guide, we will cover the core mechanics, new features, combos, and advanced techniques to maximize your efficiency with the Dual Blades. Whether you are new to the game or a long-time hunter, there is something here for you!
Core Mechanics: Demon Mode and Archdemon Mode
Demon Mode
By pressing RT (Xbox) / R2 (PlayStation), you enter Demon Mode, which significantly increases attack speed, grants access to special moves, and enables perfect dodging. However, staying in this mode constantly drains stamina, so you must manage it carefully.
- Demon Gauge: While attacking in Demon Mode, you fill the Demon Gauge.
- Blade Dance: A high-damage attack performed by pressing Y+B (Xbox) / Triangle+Circle (PlayStation) in Demon Mode. Be cautious, as it drains the Demon Gauge.
Archdemon Mode
Once the Demon Gauge is full, your normal mode transforms into Archdemon Mode:
- Your hands glow white, and attack speed is increased even outside Demon Mode.
- Demon Flurry (Y+B / Triangle+Circle) becomes available, a weaker version of Blade Dance.
- Stamina is not drained, allowing you to stay offensive without limitations.
- Perfect dodges remain active.
By alternating between these two states, you can optimize your damage output and survivability.
Combo System
Here’s a breakdown of essential Dual Blades combos:
Basic Attacks
- Basic Combo: Y → Y → Y (Xbox) / Triangle → Triangle → Triangle (PlayStation)
- Demon Mode Combo: Y → Y → Y → Y+B (Xbox) / Triangle → Triangle → Triangle → Triangle+Circle (PlayStation)
- Demon Flurry Rush: B → B → B (Xbox) / Circle → Circle → Circle (PlayStation) in Demon or Archdemon Mode
Advanced Combos
- Blade Dance: Y+B / Triangle+Circle in Demon Mode
- Demon Flurry: Y+B / Triangle+Circle in Archdemon Mode
- Five-Attack Finisher: By alternating between Demon Mode and Archdemon Mode, you can chain Blade Dance and Demon Flurry for massive damage.
New Mechanics in Monster Hunter Wilds
Perfect Evade Mechanic
A new addition to the Dual Blades is Perfect Evade, which triggers when dodging an attack at the last second using A (Xbox) / X (PlayStation).
- Grants Demon Boost Mode for 12 seconds, causing your character to glow blue.
- Increases attack power and turns dodges into damaging spin attacks.
- Encourages an aggressive, evasive playstyle for skilled hunters.
Focus Strike: Turning Tide
This new aerial attack provides an alternative way to deal burst damage:
- RB (Xbox) / R1 (PlayStation) in Focus Mode launches the hunter into the air.
- If it connects with a wounded part of the monster, the hunter hooks onto the monster and executes a Spinning Blade Dance.
- Maximizes damage output by simultaneously bursting multiple wounds.
- Also executable by dashing off a ledge while in Demon Mode.
Strengths and Weaknesses
Strengths:
✔ Fastest attack speed in the game
✔ High sustained DPS with consistent pressure
✔ Demon/Archdemon modes provide versatility
✔ Perfect evade rewards skillful dodging
✔ Strong aerial attacks with Focus Strike
Weaknesses:
✖ Short range requires close proximity to the monster
✖ No blocking capability; relies entirely on dodging
✖ High stamina consumption if not managed properly
✖ Sharpness depletes quickly due to frequent attacks
Tips for Playing Dual Blades Effectively
- Manage Stamina Wisely: Since Demon Mode drains stamina constantly, you must exit it periodically to recover.
- Sharpness is Key: Due to high attack speed, your weapon’s sharpness will decrease quickly. Sharpen between openings.
- Utilize Perfect Evade: Mastering Perfect Evade will significantly increase your survivability and damage.
- Capitalize on Openings: Use Blade Dance or the full Five-Attack Finisher when the monster is stunned, toppled, or trapped.
- Consider Secondary Weapons: If you need more defensive options, the Sword and Shield offers versatility, while the Insect Glaive maintains high mobility and offensive power.
Hammer
Introduction
In Monster Hunter Wilds The Hammer is one of the 14 weapon types available in Monster Hunter Wilds, delivering powerful blunt damage capable of stunning monsters. It rewards hunters who prefer methodical, well-timed strikes rather than fast, reactive combat. While it can be a difficult weapon for newcomers due to its slower attack speed, its devastating damage output and stunning potential make it a top choice for those who master its mechanics.
This guide will cover everything you need to know about the Hammer, including its combos, new mechanics, pros and cons, and strategies for both new and veteran players.
Pros and Cons of the Hammer
Pros:
- High damage output with charged attacks.
- Excellent for stunning monsters when attacking the head.
- Can move while charging, unlike the Great Sword.
- New offset strikes allow for additional strategic options.
- Charge step provides increased mobility and invincibility frames.
Cons:
- Slower attack speed compared to many weapons.
- Requires good positioning and precise timing.
- Cannot sever monster tails.
- Lacks a blocking mechanic.
- Can accidentally send teammates flying with certain attacks.
Hammer Combos and Moves
Basic Combos
The Hammer has some of the simplest combos in the game, making it an easy weapon to learn but difficult to master.
- Basic Combo: Overhead Smash → Overhead Smash → Upswing
(Y > Y > Y on Xbox / Triangle > Triangle > Triangle on PlayStation) - Charged Side Blow Combo: Tier 1 Charge → Two Swings
(Hold RT to charge once > Y > Y / Hold R2 to charge once > Triangle > Triangle) - Charged Upswing Combo: Tier 2 Charge → Upswing
(Hold RT to charge twice > Y / Hold R2 to charge twice > Triangle)
Big Bang Combo
The Big Bang Finisher is one of the Hammer’s most powerful combos but requires precision.
- Big Bang Combo: (B > B > B > B > B on Xbox / Circle > Circle > Circle > Circle > Circle on PlayStation)
You must land every hit in the sequence to perform the final Big Bang attack, making this most effective when a monster is stunned or knocked down.
New Mechanics and Changes in Monster Hunter Wilds
Spinning Bludgeon Attack
- Input: (Y + B on Xbox / Triangle + Circle on PlayStation)
- This attack spins the Hammer up to five times, with the final hit being an overcharge strike.
- You can now enter this move from most attacks, increasing the Hammer’s fluidity.
Mighty Charge Attack
- Input: (RT + Y + B on Xbox / R2 + Triangle + Circle on PlayStation)
- This is a strong charging attack that has two charge levels:
- Mighty Charge Upswing (First Charge)
- Mighty Charge Slam (Second Charge)
- Mighty Charge Upswing (First Charge)
- Can be transitioned into from a Tier 3 normal charge or the fourth spin of the Spinning Bludgeon.
Offset Strikes
Offset strikes introduce a new mechanic where certain attacks build up a stagger meter on the monster, eventually causing it to topple.
- Most effective offset moves:
- Third Spin of Spinning Bludgeon → Spinning Strong Upswing.
- Third strike of Basic Combo (Upswing) when timed with a monster’s attack.
- Third Spin of Spinning Bludgeon → Spinning Strong Upswing.
Offset strikes become harder to land on a monster after each successful topple, similar to status effects.
Charge Step (Formerly Keeping Sway)
- Input: (Press B on Xbox / Circle on PlayStation while holding charge)
- Allows the hunter to quickly reposition while maintaining charge level.
- Includes invincibility frames, making it a crucial defensive tool.
Focus Mode: Earthquake Strike
- Input: (RB on Xbox / R1 on PlayStation while in Focus Mode)
- A quick spinning attack that deals heavy stagger damage and allows charge retention for follow-up attacks.
Tips for Using the Hammer Effectively
- Always aim for the monster’s head.
- The Hammer is designed for stunning monsters, making the head your primary target.
- The Hammer is designed for stunning monsters, making the head your primary target.
- Use Charge Step for mobility.
- Since the Hammer lacks a block, mastering Charge Step allows you to evade damage while maintaining your charge.
- Since the Hammer lacks a block, mastering Charge Step allows you to evade damage while maintaining your charge.
- Sheath when necessary.
- Despite added mobility, the Hammer still requires proper positioning. Sheathing can help you quickly get into range.
- Despite added mobility, the Hammer still requires proper positioning. Sheathing can help you quickly get into range.
- Be mindful of team positioning.
- Spinning Bludgeon and Upswings can send allies flying. Avoid disrupting their attacks unless helping them mount a monster.
- Spinning Bludgeon and Upswings can send allies flying. Avoid disrupting their attacks unless helping them mount a monster.
- Use a secondary weapon for tail cutting.
- The Hammer excels at stunning but cannot sever tails. Consider carrying a weapon like the Long Sword or Great Sword for tail-focused hunts.
- The Hammer excels at stunning but cannot sever tails. Consider carrying a weapon like the Long Sword or Great Sword for tail-focused hunts.
- Loop Spinning Bludgeon and Mighty Charge.
- With the right positioning, you can cycle between these two attacks, creating a powerful loop of Hammer strikes.
Hunting Horns
In Monster Hunter Wilds The Hunting Horn is one of the most underrated yet powerful weapons in the Monster Hunter franchise. Often overlooked due to its seemingly plain moveset and lack of flashy skills, this weapon is the ultimate team player’s choice. It provides a variety of buffs to hunters, which vary from one horn to another. These buffs can include increased attack power, elemental resistance, health boosts, and more. However, the Hunting Horn is not just a support weapon; it also deals significant blunt damage, making it excellent for stunning monsters.
Hunting Horn Mechanics
Unlike other weapons that rely heavily on combos, the Hunting Horn operates differently. Each attack produces a musical note, and combining these notes creates melodies that provide buffs. Each Hunting Horn has three different types of notes that can be played in various sequences to perform unique melodies.
- Controls:
- Xbox: X, A, or X + A
- PlayStation: Square, Circle, or Square + Circle
- Xbox: X, A, or X + A
One essential melody that all Hunting Horns have is the Self-Improvement Melody, which is triggered after two X presses (Xbox) or two Square presses (PlayStation). This increases movement speed and prevents knockbacks.
Players can stock up to three melodies before performing them using:
- Xbox: Right Trigger (RT)
- PlayStation: R2
Melodies will be played in the order they are stored, but specific melodies can be played first by using:
- Xbox: RT + X or RT + A
- PlayStation: R2 + Square or R2 + Circle
Some melodies have multiple levels. Attack Up, for example, can be stacked up to two times, with the UI displaying:
- Yellow Buff: Can be leveled up further
- Purple Buff: Maximum level reached
Echo Waves: Offensive Melodies
Echo Waves are unique Hunting Horn moves that deal more damage than standard attacks. The damage type varies depending on the specific Hunting Horn and can include:
- Blunt
- Sever
- Elemental
- Status-inflicting damage
Combos for the Hunting Horn
While the Hunting Horn is primarily focused on melody performance, knowing its basic combos is still useful.
- Basic Combo: Forward Smash → Flourish
- Xbox: Forward + X → Forward + A
- PlayStation: Forward + Square → Forward + Circle
- Xbox: Forward + X → Forward + A
- Powerful Combo: Overhead Smash → Follow-up Attack
- Xbox: Forward + (X + A) → Repeat
- PlayStation: Forward + (Square + Circle) → Repeat
- Xbox: Forward + (X + A) → Repeat
- Basic Perform Combo: Melody Performance → Encore
- Xbox: Forward + RT → X + A
- PlayStation: Forward + R2 → Square + Circle
- Xbox: Forward + RT → X + A
- Triple Melody Effect Combo: Plays all three stored melodies in sequence with an encore
- Xbox: Forward + RT → RT → RT → RT
- PlayStation: Forward + R2 → R2 → R2 → R2
- Xbox: Forward + RT → RT → RT → RT
New Mechanics and Buffs in Monster Hunter Wilds
Echo Bubbles
A major new addition is Echo Bubbles, created by pressing:
- Xbox: B + RT
- PlayStation: X + R2
These bubbles provide buffs and can also damage monsters. Placing multiple bubbles and hitting a monster within their range can lead to high damage output.
Rhythm Mechanic
This feature allows players to shorten performance animations by timing a secondary button press during a melody. Proper execution enhances speed and efficiency in combat.
Focus Strike
A new attack where the hunter stabs forward with the horn:
- Xbox: RB
- PlayStation: R1
Landing this move initiates the Full Reverb Focus Strike, where the hunter plays the horn like a guitar. Proper timing increases damage output.
Special Performances
Each Hunting Horn has a Special Performance, activated using:
- Xbox: X + A + RT
- PlayStation: Square + Circle + R2
One of the most impactful is the Offset Melody, an Offset Attack that can topple monsters when applied multiple times, similar to a status effect.
Lance
Introduction
In Monster Hunter Wilds The Lance is the weapon of choice for those who prefer a defensive playstyle in Monster Hunter Wilds. It allows you to stand firm against the mightiest of monsters, utilizing powerful counterattacks and precise thrusts to punish enemy aggression. In this guide, we will provide an in-depth look at the Lance, covering its moveset, combos, new mechanics, strengths, weaknesses, and strategies for both new players and seasoned veterans.
Overview of the Lance
If you want a weapon that lets you laugh in the face of danger, the Lance is perfect for you. It offers exceptional guarding capabilities, precise thrusting attacks, and a variety of counters that reward patient and skillful play. In Monster Hunter Wilds, the Lance has received several combat flow changes and additions, making it even more versatile than before.
Basic Combos
Unlike other weapons, the Lance does not rely on elaborate combos but instead focuses on precise counterattacks. Here are the fundamental combos:
Triple Thrust Combo
- Input:
Y, Y, Y(Xbox) /Triangle, Triangle, Triangle(PlayStation) - Description: A straightforward three-hit thrusting combo that allows for consistent damage output while maintaining defensive positioning.
Counter Thrust Combo
- Input:
B, B, B, Hold B & Release(Xbox) /Circle, Circle, Circle, Hold Circle & Release(PlayStation) - Description: Delivers three high thrusts, ideal for hitting monster heads, followed by a charge counter.
Guard Counter Combo
- Performed After a Successful Guard
- Options:
- Return Thrust:
Y(Xbox) /Triangle(PlayStation) – A basic thrust. - Payback Thrust:
B(Xbox) /Circle(PlayStation) – A powerful high thrust. - Retribution Thrust:
Y + B(Xbox) /Triangle + Circle(PlayStation) – A two-hit counter attack that can be followed up with a dash attack.
- Return Thrust:
New Additions and Changes
Directional Movement with Thrusts
- The Lance now allows movement in any direction while performing three-hit thrust combos, improving mobility and positioning.
Charge Counter
- Input:
Hold B(Xbox) /Hold Circle(PlayStation) while guarding or after specific combos. - Function: Charges up to three levels and releases a powerful double-thrust counter. If timed with a monster’s attack, it deals massive damage.
Offset Attacks
- A new system where attacking just as a monster attacks fills an invisible meter, eventually toppling the monster.
- Best Used: When countering powerful monster strikes.
Perfect Guard
- How to Trigger: Guarding just before an attack lands.
- Effect: Negates damage and automatically retaliates with a shield bash.
- Follow-Up Options:
- Return Thrust (
Y/Triangle) - Payback Thrust (
B/Circle) - Retribution Thrust (
Y + B/Triangle + Circle)
- Return Thrust (
Power Guard
- How to Trigger: Initiate a Charge Counter (
Hold B/Hold Circle), then pressA(Xbox) /X(PlayStation). - Effect: Provides 360-degree protection, blocking nearly any attack but rapidly draining stamina.
- Counters After Power Guard:
- Leaping Thrust (
Y/Triangle) - Payback Thrust (
B/Circle) - Grand Retribution Thrust (
Y + B/Triangle + Circle) – A stronger version of Retribution Thrust when hit during Power Guard.
- Leaping Thrust (
Guard Dash & Shield Bash
- Guard Dash:
Y(Xbox) /Triangle(PlayStation) + Direction while guarding. - Follow-Ups:
- Shield Bash (
Y/Triangle) – Stun damage. - Leaping Thrust (
B/Circle) – A mobile two-hit thrust.
- Shield Bash (
Focus Mode and Victory Thrust
- Focus Mode: Enables precision strikes.
- Victory Thrust:
RB(Xbox) /R1(PlayStation) while in Focus Mode – A high-damage multi-hit strike.
Strengths and Weaknesses
Strengths:
✅ Best guard in the game, reducing damage intake significantly.
✅ High counterattack potential with Charge Counter and Perfect Guard.
✅ Improved mobility and offensive capabilities.
✅ Offset Attacks add an extra layer of stagger potential.
Weaknesses:
❌ Limited combo variety compared to other weapons.
❌ Heavy reliance on stamina management for Power Guard.
❌ Can struggle against highly mobile monsters due to its slower attack speed.
Advanced Tips and Strategies
1. Mastering Guarding
- Use Perfect Guard as often as possible to completely nullify damage.
- Power Guard should be reserved for the strongest attacks but watch your stamina bar.
2. Optimal Counter Usage
- Time Charge Counters for maximum damage output and monster topples.
- Use Offset Attacks strategically to stagger enemies.
3. Maintaining Pressure
- Guard Dash and Leaping Thrust help close gaps while maintaining a defensive stance.
- Always keep Triple Thrust Combos aimed at weak points.
Recommended Secondary Weapon: Gunlance
If you enjoy the Lance but want more explosive options, the Gunlance provides similar defensive capabilities with added shelling attacks for breaking monster parts more effectively.
Gunlance
In Monster Hunter Wilds The Gunlance in Monster Hunter Wilds is the explosive, loud cousin of the Lance, boasting impressive defense with extended range. For hunters seeking a weapon that combines solid defense with powerful attacks and a bit of a boom, the Gunlance is the perfect choice. Whether you’re a new player or a seasoned veteran, the Gunlance offers unique challenges and satisfying rewards.
In this guide, we will cover combos, special moves, the changes made to the Gunlance in Monster Hunter Wilds, and tips on how to make the most of it. So, let’s dive right in!
Basic Combos
Understanding the basic combos of the Gunlance is crucial for maximizing your damage output and flow during combat. Here’s a breakdown of the main combos:
1. Worm Steak Cannon Combo
This combo consists of two thrusts followed by a wide sweep and chains into the Worm Steak Cannon. It’s the basic combo and a great way to consistently deal damage.
- Combo: Press Y, Y, Y, Y (or Triangle, Triangle, Triangle, Triangle).
2. Worm Steak Full Blast Combo
This combo begins with a shelling attack and finishes with a full multi-Worm Steak Full Blast. This is a stronger combo but takes more time to execute.
- Combo: Press B, left stick + Y, Y + B, then Y or B (or on PlayStation: Circle, left stick + Triangle, Triangle + Circle, then Triangle or Circle).
3. Burst Fire Combo
A faster combo that starts with a rising slash and transitions into a burst fire. It’s useful for smaller windows of opportunity.
- Combo: Press Y + B, then Y, then B (or Triangle + Circle, then Triangle, then Circle).
Key Changes in Monster Hunter Wilds
Monster Hunter Wilds introduces some significant changes to the Gunlance, improving its flow and making it more user-friendly. Here are the key updates:
1. Shelling Changes
- Shelling now no longer affects sharpness, meaning you can maintain your uptime without needing to sharpen your Gunlance frequently. This is a huge boon for sustained damage.
- You can now move between shells, making it easier to reposition and combo into other moves.
- Charging Shells: Holding down the shelling button now charges shells, allowing you to load up a certain number of shells before using them. This increases shell damage and quickly fills your Wyvern Fire gauge.
2. Perfect Guard
The introduction of the Perfect Guard improves the Gunlance’s defensive capabilities. Perfect Guard lets you defend even while reloading and opens up opportunities to go into combos right after blocking.
- Perfect Guard Follow-Ups: After a perfect guard, you can transition into an overhead slam (press Y or Triangle) or a Burst Fire (press B or Circle).
- Power Clash: Perfect guarding and guarding will trigger a Power Clash, and winning the clash shoots all your shells, dealing massive damage. You can follow up with a Worm Steak Full Blast for even more damage.
3. New Moving Wide Sweep
The Gunlance now has a Moving Wide Sweep, which can be followed up with powerful moves like Worm Steak Full Blast or Wyvern Fire Blast. This is a great tool for keeping the pressure on your monster.
4. Wyvern Fire Blast Updates
Wyvern Fire Blast, the signature move of the Gunlance, has been improved. Now, you can store two blasts and recover charges faster by shelling or attacking. The range has been increased, and there are two types of Wyvern Fire: a standard charge and a quick variation that can be used after actions like Perfect Guard or Full Burst.
Additional Features and Combos
1. Focus Mode and Drake Augur
In Focus Mode, the Gunlance transforms into a powerful tool for continuous damage. The Drake Augur thrust turns your Gunlance into a drill, dealing damage and ending with a Worm Steak Cannon. You can also end Drake Augur early for a quicker transition into Worm Steak Cannon.
- To perform: Press RB on Xbox or R1 on PlayStation while in Focus Mode.
2. Shelling Types
There are three shelling types for the Gunlance, which affect your range, area of effect, and reload times:
- Normal Shells: Balanced damage and range.
- Wide Shells: Shorter range but wider area of effect (like a shotgun).
- Long Shells: Slightly longer range than normal shells but less area of effect.
Different Gunlances come with varying shelling power and reload times. Wide shelling Gunlances typically have fewer shells before needing a reload, while Normal and Long shelling Gunlances tend to have more shells before reload.
3. Dismount Attacks
The Gunlance has access to dismount jumping attacks, making it easier to mount and topple monsters compared to previous games in the series.
Strengths of the Gunlance
- Strong Defense: The Gunlance has one of the best block ratings in the game, making it ideal for defensive playstyles.
- Sustained Damage: Thanks to changes in shelling and perfect guarding, the Gunlance can deal consistent damage while maintaining its defense.
- Versatility in Combos: The Gunlance boasts multiple powerful combos, with the ability to adjust between them depending on the situation.
Weaknesses of the Gunlance
- Slow Mobility: The Gunlance is still one of the slower weapons in the game. Dodging massive monster attacks can be tricky, and sheathing the weapon is often the best option.
- Limited Sever Damage: Unlike the Lance, the Gunlance does not have great sever damage capabilities. If you need to cut tails, the Gunlance may not be the best choice.
- No Power Guard: While the Gunlance has excellent defense, it lacks the Power Guard ability found in the Lance, making it slightly less versatile in blocking powerful attacks.
Advanced Tips for Gunlance Players
- Blocking and Power Clashes: Mastering the Perfect Guard and timing your blocks is critical. A successful Power Clash can deal huge damage, so learning when to guard and when to attack is key.
- Mounting and Positioning: Gunlance users excel at mounting monsters and breaking parts. Focus on hitting the monster’s head or body to maximize part breaks, as the Gunlance doesn’t perform well at severing tails.
- Secondary Weapon Choices: If you’re looking for a complementary weapon to the Gunlance, the Lance is an excellent option for severing damage, while the Charge Blade or Sword and Shield provide mobility and versatility.
Switch Axe
In Monster Hunter Wilds The Switch Axe is one of the most versatile weapons in Monster Hunter Wilds, offering players a combination of massive damage and excellent reach. For both new hunters and veterans, understanding the mechanics of this weapon is crucial to mastering its potential. Whether you’re just starting out or looking for what’s new in Monster Hunter Wilds, this comprehensive guide will break down everything you need to know, including combos, new changes, tips, and tricks to help you make the most of the Switch Axe.
Weapon Overview
The Switch Axe excels in both its Axe Mode and Sword Mode. The Axe Mode provides great reach and mobility, while the Sword Mode delivers high damage and elemental bursts. The versatility of this weapon makes it an ideal choice for hunters who want to combine power and agility in one.
However, it is worth noting that the Switch Axe is not an easy weapon to pick up. Its mechanics are complex, particularly for new players, due to the need to manage multiple gauges and understand when to switch between modes. But if you’re willing to learn, the Switch Axe rewards you with some of the best damage output in the game.
Combos and Moves
1. Axe Mode Combo for Quick Switch Gauge Fill
To build up your Switch Gauge quickly, you’ll want to chain together this fast combo:
- Combo: Press Y, Y, Y (Xbox) or Triangle, Triangle, Triangle (PlayStation).
This combo helps you quickly fill your Switch Gauge, which is crucial for transitioning into Sword Mode.
2. Axe Combo to Switch to Sword Mode
Switching between modes is key to mastering the Switch Axe. To transition from Axe Mode to Sword Mode:
- Combo: Press B, Y, Right Trigger, B (Xbox) or Circle, Triangle, R2, Circle (PlayStation).
This combo morphs the axe into the sword, allowing you to utilize your sword-based attacks.
3. Sword Mode Combo to Fill the Amp Gauge
When you’re in Sword Mode, use this combo to quickly charge your Amp Gauge:
- Combo: Press B, B (Xbox) or Circle, Circle (PlayStation).
Filling the Amp Gauge puts you into the Amped State, enabling your sword attacks to deal elemental damage and trigger powerful follow-up attacks.
4. Basic Sword Mode Combo
This is your standard combo for Sword Mode. It’s a basic slashing sequence, where you can move between each slash:
- Combo: Press Y, Y, Y (Xbox) or Triangle, Triangle, Triangle (PlayStation).
Use this combo to build up damage in Sword Mode.
5. Powerful Finisher Combo
When the monster is open, use this powerful combo to deal massive damage:
- Combo: Press Y + B, then rapidly press Y, then Right Trigger (Xbox) or Triangle + Circle, then rapidly press Triangle, then R2 (PlayStation).
In the Amped State, you can use the Full Release Slash instead of the Unbridled Slash for a more powerful finish. This move deals huge elemental damage, but it consumes a significant amount of the Switch Gauge.
Switch Axe Mechanics
The Switch Axe features three primary gauges:
- Switch Gauge: Charges when landing attacks in Axe Mode or when reloading. It is essential to build this up to switch to Sword Mode.
- Amp Gauge: Fills when landing attacks in Sword Mode. When full, it activates the Amped State, adding elemental explosions and allowing the powerful Full Release Slash.
- Power Axe Mode: Activated when you land follow-up attacks, increasing your Axe damage and charging the Switch Gauge faster. This is one of the new features in Monster Hunter Wilds.
Files and Their Impact
Much like the Charge Blade, the Switch Axe uses Files that enhance your attacks in different ways. These files determine the type of damage or status effect your sword attacks will trigger while in the Amped State. There are six types of files:
- Power File: Increases physical damage.
- Element File: Boosts elemental damage.
- Poison File: Adds poison damage.
- Paralysis File: Adds paralysis.
- Dragon File: Adds dragon elemental damage.
- Exhaust File: Decreases the monster’s stamina.
New Features and Changes in Monster Hunter Wilds
Offset Attacks
In Monster Hunter Wilds, the Switch Axe gains new Offset Attacks, adding more responsiveness to the weapon. Offset Attacks are designed to fill up an invisible meter on the monster, similar to a status effect, and can topple the monster if triggered. This makes the Switch Axe more versatile in dealing with aggressive monsters.
How to Perform an Offset Attack:
- Offset Rising Slash: Press Y + B (Xbox) or Triangle + Circle (PlayStation). If this attack connects with a monster’s move, it will topple the monster, leaving you with an opening to deal additional damage.
Once the monster is toppled, you can follow up with a Heavy Slam (puts the Axe into Power Mode) or a Follow-Up Morph Slash (morph into Sword Mode).
New Full Release Slash and Unbridled Slash
The Full Release Slash is a more powerful, charged version of the Unbridled Slash. It deals more damage but takes longer to execute. You can perform the Unbridled Slash anytime you’re in Sword Mode, while the Full Release Slash requires you to be in the Amped State.
Unbridled Slash:
- Xbox: Press Right Trigger + Y + B.
- PlayStation: Press R2 + Triangle + Circle.
Full Release Slash:
- Xbox: Hold Right Trigger, then press Y + B.
- PlayStation: Hold R2, then press Triangle + Circle.
Both moves deal huge elemental damage but consume a significant portion of your Switch Gauge.
Powerful New Counterattacks
The Switch Axe also gains a new counterattack, the Counter Rising Slash, which allows you to counter an enemy’s attack and follow it up with a powerful combo.
Counter Rising Slash:
- Xbox: Press Right Trigger + Y while in Sword Mode.
- PlayStation: Press R2 + Triangle while in Sword Mode.
Tips for Using the Switch Axe
- Manage Your Gauges: One of the most critical aspects of using the Switch Axe is managing your Switch and Amp gauges. Fill the Switch Gauge to switch to Sword Mode, and use the Sword Mode combos to charge the Amp Gauge. Once the Amp Gauge is full, you can enter the Amped State and unleash powerful attacks.
- Use Elemental Discharge Wisely: The Elemental Discharge is a powerful move, but it depletes the Switch Gauge quickly. Use it strategically, and consider sharpening your weapon between uses to keep it effective.
- Mobility in Axe Mode: Axe Mode offers better mobility than Sword Mode, so use it for positioning and quick attacks. If you need to move around the battlefield a lot, Axe Mode is your best friend.
- Keep an Eye on Sharpness: The Switch Axe can lose sharpness rapidly when using Elemental Discharge. Keep an eye on your weapon’s sharpness, and be ready to sharpen it when necessary.
- Offset and Counter Slashes: These new mechanics provide additional defensive options. Timing these attacks properly can create openings for your team and help you avoid taking damage.
Recommended Secondary Weapon
For those using the Switch Axe as their primary weapon, pairing it with a Great Sword can offer powerful charged attacks and more defensive options. If you’re looking for something more defensive, the Gunlance or Lance are solid options, although they are slower and less mobile.
Charge Blade
Introduction
In Monster Hunter Wilds The Charge Blade in Monster Hunter Wilds has cemented its place as one of the most technical and unique weapons in the series. As one of two morph weapons in the game, it brings the ability to switch between sword and shield mode for defensive play and axe mode for devastating attacks. However, mastering the Charge Blade isn’t an easy task, especially for newcomers to Monster Hunter Wilds. If you’re a veteran returning to see the changes or a newbie curious about its mechanics, this guide will break down everything you need to know about the Charge Blade, including its combos, mechanics, and tips for both offense and defense.
Charge Blade Basics
The Charge Blade’s core feature is its ability to switch between two forms: Sword & Shield Mode and Axe Mode. The weapon functions with energy files that charge up during sword attacks and can be unleashed in axe mode for massive damage. Here’s an overview of the basic combos and mechanics you need to master:
Sword & Shield Mode Combos:
- Basic Combo:
- Perform a sword shield thrust attack by pressing Y + B (Xbox) or Triangle + Circle (PlayStation).
- Follow this up with Y, Y (Xbox) or Triangle, Triangle (PlayStation) to execute the combo.
- Perform a sword shield thrust attack by pressing Y + B (Xbox) or Triangle + Circle (PlayStation).
- Charge Double Slash (for Elemental Boost):
- Charge the sword by holding B (Xbox) or Circle (PlayStation), release, then press RT + B (Xbox) or R2 + Circle (PlayStation).
- After charging, press B (Xbox) or Circle (PlayStation) followed by Y + B (Xbox) or Triangle + Circle (PlayStation) to initiate the elemental boost.
- Charge the sword by holding B (Xbox) or Circle (PlayStation), release, then press RT + B (Xbox) or R2 + Circle (PlayStation).
Axe Mode Combos:
- Elemental Discharge Combo:
- Transition into Axe Mode with Y + B (Xbox) or Triangle + Circle (PlayStation).
- Execute another Y + B or Triangle + Circle for additional damage, followed by B or Circle, and finish with Y + B or Triangle + Circle.
- Transition into Axe Mode with Y + B (Xbox) or Triangle + Circle (PlayStation).
- Super Amped Elemental Discharge:
- This is the Charge Blade’s bread and butter. To perform it, press RT + Y (Xbox) or R2 + Triangle (PlayStation) and follow it up with Y + B or Triangle + Circle. This combo unloads all of your stored energy into the monster for massive damage.
The Core Mechanic: Managing Files
The Charge Blade’s unique mechanic revolves around files—energy that you accumulate by attacking monsters while in sword mode. These files can be used to power up your attacks or shield for buffs. There are two types of files: Elemental Files and Impact Files. Depending on the Charge Blade you’re using, you’ll want to pay attention to the type of file you have, as it can change how you approach different hunts.
- Elemental Files allow you to imbue your attacks with elemental damage, such as Thunder, Fire, Ice, etc.
- Impact Files provide a more physical, raw damage output but lack elemental properties.
Overcharging Files:
In Monster Hunter Wilds, you can now overcharge your files, which gives you a significant damage boost when in Axe Mode. This addition enhances the Charge Blade’s offensive potential and is especially useful for players who have mastered timing their sword and shield combos.
Savage Axe Mode and Power Axe Mode
Savage Axe Mode reduces the file usage of your axe-enhanced attacks, allowing you to stay in axe mode for longer periods. This is a crucial change in Monster Hunter Wilds, as it opens up more opportunities for sustained damage.
You can trigger Savage Axe Mode through various methods:
- Mounted Attack Finisher: After landing the finisher attack, you enter Power Axe Mode.
- Perfect Guard + Savage Axe Slash: This gives you access to the Power Axe Mode buff.
- Focus Strike Double Slash: Executing this move while in Focus Mode also triggers the Power Axe Mode buff.
Once in Power Axe Mode, your axe attacks become more potent, and you can chain multiple hits, especially when performing a Multi-Hit Attack. To do this, hold the attack input the moment your strike lands on the monster for additional hits and damage.
Shield Boost and Guarding
One of the Charge Blade’s key defensive features is the shield boost, which enhances your defense and gives you a Guard Point. This can be charged after any charge strike or by holding the charge button after performing a combo, giving you the ability to absorb monster attacks while in sword mode.
Perfect Guard and Power Clashes provide additional defense options, giving you more opportunities to block and follow up with offensive combos.
Focus Mode: A Game-Changer
Focus Mode makes it easier to block monster attacks while in Sword Mode and seamlessly transition into the Super Amped Elemental Discharge in Axe Mode. This ability allows you to be more versatile and responsive to incoming damage while staying on the offensive.
Weapon Synergy and Elemental Considerations
Choosing the right Charge Blade depends heavily on the monster you are hunting. Since much of the Charge Blade’s damage comes from elemental-infused attacks, learning what elemental weaknesses your target has will significantly improve your efficiency. Additionally, it is common to carry multiple Charge Blades, with one using Elemental Files and the other using Impact Files, for a wider range of versatility.
Tips for Beginners
- Start with Sword & Shield Mode: It’s easier to control and offers decent mobility, allowing you to get familiar with the weapon’s timing and combo system.
- Master File Management: The Charge Blade’s damage potential is heavily reliant on managing files. Make sure you’re efficiently filling and using your files to maximize your damage output.
- Learn Monster Patterns: Timing is crucial with the Charge Blade, so learning monster attack patterns will help you avoid being caught mid-combo and expose openings for powerful counterattacks.
Insect Glaive
In Monster Hunter Wilds The Insect Glaive in Monster Hunter Wilds remains one of the most dynamic and unique weapons available, offering a playstyle that heavily emphasizes aerial combat. If you’re a new player looking to master this weapon or a veteran returning after some time, this guide will walk you through everything you need to know about the Insect Glaive. From its mechanics and combos to tips and strategies, let’s dive into the world of the Insect Glaive.
Weapon Overview
The Insect Glaive is a highly mobile weapon that lets players vault into the air with ease, positioning themselves for strategic attacks. While it may have lost some of its aerial prowess compared to previous Monster Hunter installments, it remains an excellent choice for those who want to keep their mobility high while dealing with the monster at a distance.
A key feature of the Insect Glaive is the Kinsect, an insect companion that attaches to the player’s arm and can be sent out to gather essences from monsters, providing buffs or debuffs. These Kinects offer an additional layer of strategy and allow the hunter to adapt to various situations.
The Kinsect Mechanic
In Monster Hunter Wilds, Kinects play a crucial role in the Insect Glaive’s functionality. The Kinects are responsible for gathering essences from different parts of the monster’s body, and these essences provide specific buffs to the player or debuffs to the monster. Each essence color corresponds to different body parts of the monster:
- Red Essence: Head
- White Essence: Legs
- Orange Essence: Belly and Body
- Green Essence: Tail
Learning to extract essences efficiently is critical for mastering the Insect Glaive. As you become more familiar with monster body parts and their corresponding essences, you’ll find that managing your Kinsect becomes easier and more intuitive.
The Basic Combos
Here’s an overview of the basic combos you’ll use as you wield the Insect Glaive:
- Basic Combo: The basic combo can be executed by pressing Y, Y, Y, B (Xbox) or Triangle, Triangle, Triangle, Circle (PlayStation). This combo allows you to chain multiple attacks and is the foundation of your offensive playstyle.
- Dust Effect Combo: This combo lets you detonate your Kinsect’s powder. It’s performed by pressing RT (Right Trigger) + RT then Back on Left Stick + A, followed by Y (Xbox), or R2 + R2, Back on Left Stick + X, then Triangle (PlayStation).
- Midair Combo: This is perfect for traversing large distances in the air and also works well for mounting monsters. To perform this combo, press RT + A, then A, and then Y (Xbox), or R2 + X, then X, and then Triangle (PlayStation).
- Powerful Combo with Three Extracts: The most powerful move of the Insect Glaive is executed by pressing Forward on Left Stick + B (hold), then Left Trigger (hold) + B (Xbox) or Forward on Left Stick + Circle (hold), then L2 (hold) + Circle (PlayStation).
This move is crucial for dealing high damage but requires the gathering of all three essences.
Key Moves and Techniques
While the Insect Glaive excels in mobility, it has several key moves that increase its power and effectiveness:
- Rising Spiral Slash: A powerful finisher move performed by pressing Left Trigger + B (Xbox) or L2 + Circle (PlayStation). This move requires all three essences and deals high damage. It also has the added bonus of gathering essences in the vicinity after landing the attack, making it easier to re-collect essences quickly.
- Essence Extraction: In Monster Hunter Wilds, essence extraction has received several improvements. When you aim your Kinsect, you can now see the essence of the body part you’re aiming at, which helps you target the right areas more effectively. Additionally, holding RT (Xbox) or R2 (PlayStation) will charge your Kinsect, allowing it to pierce through the monster and collect multiple essences faster.
- Descending Slash: Red Essence allows you to charge this move by holding B (Xbox) or Circle (PlayStation), which increases its power. If you have all three essences, the move upgrades to the Strong Descending Slash, a move that leads into the Rising Spiral Slash for devastating combos.
- Focus Thrust Leaping Strike: This new move in Monster Hunter Wilds is executed by pressing RB (Xbox) or R1 (PlayStation) while in Focus Mode. It’s a thrust and kickback attack that deals massive damage when hitting monster wounds. This move also instantly extracts all three essences, making it a highly efficient attack for gathering buffs.
Kinsect Types and Upgrades
There are two types of Kinects: Blunt and Severing, each providing different types of damage.
- Blunt Kinects (e.g., Maul Drone) deal blunt damage and are great for stunning monsters.
- Severing Kinects (e.g., Cold Drone) deal severing damage, which is perfect for cutting off monster parts.
Kinects can be upgraded to higher rarities and provide additional bonuses to your attacks or buffs. The key to success is finding the right combination of Kinsects and Kinects to suit your playstyle.
Advanced Tips for Veteran Players
- Mastering Aerial Combat: The Insect Glaive excels at aerial combat, and even though its aerial prowess has been toned down in Wilds, it’s still essential for maintaining mobility. When fighting large monsters, use your jumping and vaulting abilities to keep up the pressure and dodge incoming attacks.
- Kinsect Management: As a veteran, you should be familiar with the importance of managing your Kinsect. When extracting essences, position yourself strategically to maximize your Kinsect’s efficiency. Don’t just rely on the default attack; use the charged Kinsect for faster essence extraction, especially in challenging hunts.
- Pairing Essences for Maximum Effect: Different combinations of essences provide powerful buffs, such as increasing your attack, defense, or recovery. For example, pairing Red and White increases your attack, while White and Orange boosts defense. Always be mindful of the essences you’re gathering to ensure you get the best possible buffs for your playstyle.
Secondary Weapon Recommendations
If you’re looking for a secondary weapon to complement the Insect Glaive, consider the Dual Blades. They offer a fast attack speed and high mobility, much like the Insect Glaive, making them a perfect complement. You can alternate between the two weapons depending on the situation, maximizing your damage output and versatility.
Light Bow Gun
In Monster Hunter Wilds The Light Bow Gun (LBG) is one of the 14 weapons in Monster Hunter Wilds, offering players a fast-paced, ranged playstyle that prioritizes mobility and quick, constant damage. Whether you’re a seasoned veteran returning to the game or a new hunter looking to try something different, this guide covers all aspects of the Light Bow Gun, from its unique playstyle and weapon mechanics to tips for both beginners and experienced players. Let’s dive in!
Overview of the Light Bow Gun
The Light Bow Gun is a ranged weapon that thrives on agility and rapid fire. Perfect for hunters who prefer a dodging, run-and-gun playstyle, this weapon is ideal for dealing continuous damage while remaining mobile and avoiding incoming attacks. If you’ve enjoyed shooter-style games in the past and are looking to translate that into Monster Hunter Wilds, the Light Bow Gun might be your weapon of choice.
Light Bow Gun vs. Heavy Bow Gun: What’s the Difference?
Before we get into the details of the Light Bow Gun, it’s important to understand how it compares to the Heavy Bow Gun, one of the other ranged weapons in the game.
- Mobility: The Light Bow Gun is far more agile than the Heavy Bow Gun, allowing you to move quickly and dodge attacks more efficiently. The Heavy Bow Gun, by contrast, is slower and more cumbersome, making it less effective in close-quarters combat.
- Range: The Light Bow Gun excels at close to mid-range combat, whereas the Heavy Bow Gun has a longer effective range but struggles at closer distances. If you prefer getting in close to monsters while maintaining agility, the Light Bow Gun is your best bet.
- Defensive Options: The Light Bow Gun relies on dodges and positioning to avoid damage, whereas the Heavy Bow Gun offers auto guard and perfect guards, making it more defensive in nature.
- Customization: Both guns offer mod slots for customization, but the Heavy Bow Gun has an edge with an extra special ammo slot. The Light Bow Gun, however, has an extra mod slot, giving you more flexibility for tweaking your setup.
Key Features and Changes in Monster Hunter Wilds
The Light Bow Gun has undergone some exciting changes in Monster Hunter Wilds, making it more versatile and aggressive than ever before.
Rapid Fire Mode
One of the biggest additions to the Light Bow Gun is the Rapid Fire Mode, activated by pressing B on Xbox or Circle on PlayStation. This mode attaches an ammo drum to your weapon, increasing the rate of fire. The Rapid Fire Gauge fills up as you land shots on monsters, allowing you to sustain high output damage over time. The Light Bow Gun can now rapidly fire several types of ammo, including normal, spread, and pierce.
- Normal Ammo: Rapid fire turns your normal shots into a burst of 3-5 rounds, though with slightly reduced damage per shot.
- Spread Ammo: Fires two consecutive volleys of projectiles in rapid succession, doubling damage output.
- Thunder Ammo: Delivers a powerful blast in quick succession, also benefiting from the rapid-fire rate.
This mode significantly enhances your offensive capabilities and is ideal for players who like to be aggressive and stay on the move. However, remember that the rapid-fire mode drains your Rapid Fire Gauge, so managing it effectively is key to maximizing your damage.
Chaser Shots
The Chaser Shot is another exciting feature that adds depth to the Light Bow Gun’s arsenal. After firing a shot, you can follow it up with a Chaser Shot (activated by B on Xbox or Circle on PlayStation). These shots are more powerful than regular ones but slow you down while firing. You can chain these shots into Rapid Chaser Shots, a quick-fire attack that ends with a powerful blast.
- Tip for Chaser Shots: Use them strategically when you have a good opening to land a powerful blow, but be mindful of the reduced mobility during the shot.
Special Ammo
The Light Bow Gun offers a variety of special ammo types, each serving different purposes.
- Wyvern Blast: This special ammo lays a mine that explodes after a short time, or when shot near it. It’s perfect for toppling monsters or for monsters that are stunned.
- Adhesive Ammo: This ammo sticks to the monster and explodes after a set time, dealing extra damage when the monster is hit while the ammo is attached. Ideal for targeting monster parts like tails and claws.
- Focus Blast Eagle Strike: A charged grenade that explodes on impact, dealing significant damage in a wide radius. Hold the button to charge and increase the damage.
These special ammo types offer players flexibility in dealing with various types of monsters and can be the difference between a successful hunt or failure. Knowing when and where to use these ammo types is crucial for maximizing damage.
Ammo Customization and Mods
Unlike other games in the franchise, Monster Hunter Wilds allows you to modify your ammo’s behavior through mods and special ammo slots. The Light Bow Gun has two mod slots and one special ammo slot. Here’s what you can do:
- Mod Slot 1: You can increase the capacity of normal, spread, or elemental ammo types, or boost their effectiveness with powders.
- Mod Slot 2: Similar to Slot 1, but some Light Bow Guns also offer rapid fire mods or special ammo mods. These can increase the capacity or fill rate of Rapid Fire mode or special ammo, allowing for more frequent use of these powerful features.
Ammunition Changes in Monster Hunter Wilds
Monster Hunter Wilds has also changed how ammo functions. Some of the major updates include:
- Unlimited Spread and Piercing Ammo: These ammo types no longer need to be crafted and are available for use at any time.
- Grenade-Like Shots: Recovery and Demon ammo have been reworked into shots that create an area of effect, healing teammates or buffing them in a more reliable manner.
Tips for Mastering the Light Bow Gun
- Focus on Mobility: The Light Bow Gun is all about staying agile. Use dodges to avoid incoming attacks while keeping up a constant barrage of fire. Burst Steps (performing a dodge while shooting) are great for staying in the fight while repositioning yourself.
- Manage Ammo and Gauges: Keep an eye on the Rapid Fire Gauge and Special Ammo Gauge. Make sure to use them at the right moments for maximum impact. Chaser Shots and Burst Steps work great when paired with the rapid-fire mode, but don’t waste your special ammo unless it’s the right moment.
- Target Weak Points: Use Adhesive Ammo for precision shots to monster parts. Focus on tail or claws to break off valuable materials.
- Be Aggressive: With its rapid mobility and fast shot speeds, the Light Bow Gun rewards players who stay on the move and stay aggressive. Don’t be afraid to get close to the monster and unleash a rapid barrage of attacks.
- Know the Ammo Types: Experiment with different ammo types to understand their mechanics. Each ammo type serves a unique role in combat, so mastering the different variations will give you an edge in any hunt.
Heavy Bow Gun
In Monster Hunter Wilds The Heavy Bow Gun (HBG) in Monster Hunter Wilds is one of the game’s three ranged weapons and a true artillery powerhouse. In this guide, we’ll dive deep into the strengths and weaknesses of the Heavy Bow Gun, compare it to its counterpart—the Light Bow Gun (LBG)—and provide you with valuable tips on how to use it effectively, whether you’re a new player or a seasoned veteran. Let’s break down everything you need to know to dominate with this powerful ranged weapon!
Overview of the Heavy Bow Gun
The Heavy Bow Gun is known for its ability to deal high damage, break monster parts more easily, and stun foes with its mighty shots. This weapon is designed for players who prefer to stand their ground and deal massive damage from a distance, sacrificing mobility for firepower. If you like the idea of being a tank with the ability to shred monsters from afar, this is the weapon for you.
In Monster Hunter Wilds, the HBG has gone through significant changes. While it is still the slow-moving, hard-hitting beast it was in previous entries, the new ignition system and defensive mechanics offer more dynamic ways to play. Let’s explore what these changes mean for you as a player.
Heavy Bow Gun vs. Light Bow Gun
Before diving into the specifics of the Heavy Bow Gun, it’s important to understand how it differs from the Light Bow Gun. Here’s a quick comparison:
- Mobility: The Light Bow Gun is much more agile and quicker on its feet, making it a better choice for players who enjoy mobility and dodging. The Heavy Bow Gun, on the other hand, is slower and more cumbersome, but it compensates with sheer power.
- Effective Range: While the LBG is better suited for close to mid-range combat, the HBG excels at mid to long-range attacks. If you’re someone who likes to keep your distance, the Heavy Bow Gun will be your weapon of choice.
- Defensive Mechanics: Light Bow Gunners rely on dodging and positioning to avoid damage, while Heavy Bow Gun users have auto-guard, allowing them to block attacks passively. Additionally, perfect guards and the ability to stagger monsters through a timed shot provide more defensive tools.
- Customization: The Heavy Bow Gun offers two mod slots and two special ammo slots, giving it more customization options than the Light Bow Gun. This allows you to tailor your weapon to suit your playstyle.
- Fire Modes: The LBG has rapid fire mode, while the HBG features Ignition mode, a more versatile firing mode that opens up several attack options.
Changes to the Heavy Bow Gun in Monster Hunter Wilds
In Monster Hunter Wilds, the Heavy Bow Gun has undergone some significant changes. Let’s break down these changes:
- Mod and Special Ammo System:
- The Heavy Bow Gun now features two mod slots and two special ammo slots. These changes allow players to increase ammo capacity or enhance specific ammo types.
- The mods can either increase magazine capacity (for Normal, Pierce, Spread, or Elemental ammo) or provide enhanced powders that boost ammo effectiveness.
- The second mod slot allows players to choose between upgrades for Standard Mode (increasing damage) or Ignition Mode (enhancing firepower and speed).
- The Heavy Bow Gun now features two mod slots and two special ammo slots. These changes allow players to increase ammo capacity or enhance specific ammo types.
- Ignition Mode:
- One of the most exciting changes is the introduction of Ignition Mode. By pressing a button (B on Xbox or Circle on PlayStation), you activate Ignition Mode, which drains an ignition gauge as you fire.
- Two firing types are available:
- Wyvern Heart Ignition: Turns your Heavy Bow Gun into a rapid-fire machine gun, dealing more damage the longer you fire. This is great for creating wounds on monsters.
- Wyvern Piercer Ignition: Fires a slow-moving bullet that pierces through the monster, gaining power as it travels. This is excellent against large monsters.
- Wyvern Heart Ignition: Turns your Heavy Bow Gun into a rapid-fire machine gun, dealing more damage the longer you fire. This is great for creating wounds on monsters.
- One of the most exciting changes is the introduction of Ignition Mode. By pressing a button (B on Xbox or Circle on PlayStation), you activate Ignition Mode, which drains an ignition gauge as you fire.
- New Offensive and Defensive Special Ammo:
- Wyvern Counter Ignition: This new defensive move attaches a device to your Heavy Bow Gun’s barrel and charges up for a massive burst of damage. Timing is key here, as you’ll need to wait for the right moment to detonate it.
- Wyvern Blast Ignition: This is an aggressive option where the Heavy Bow Gun fires two grenades that split into smaller ones, dealing massive damage in a wide area.
- Wyvern Counter Ignition: This new defensive move attaches a device to your Heavy Bow Gun’s barrel and charges up for a massive burst of damage. Timing is key here, as you’ll need to wait for the right moment to detonate it.
- Auto Guard and Perfect Guard:
- The HBG now has an auto-guard feature, where it will automatically block attacks as long as you’re not mid-animation.
- Perfect Guard, however, must be performed manually by pressing a specific button combo (Y + B on Xbox or Triangle + Circle on PlayStation). Timing this correctly will allow you to block an attack and trigger a Power Clash mechanic, ending with a devastating shot.
- The HBG now has an auto-guard feature, where it will automatically block attacks as long as you’re not mid-animation.
- Ammo System Changes:
- The normal ammo now has a rapid-fire variant, and Spread and Pierce ammo types are no longer limited by ammo levels—meaning you don’t need to craft them anymore.
- New recovery and demon ammo now functions like grenades that stick to monsters, making it much easier to heal or buff teammates during battle.
- The normal ammo now has a rapid-fire variant, and Spread and Pierce ammo types are no longer limited by ammo levels—meaning you don’t need to craft them anymore.
- Focus Blast (Wyvern Howl):
- This new feature lets you fire a missile that sticks to the monster, similar to Sticky ammo, dealing significant damage when it detonates.
How to Use the Heavy Bow Gun
Basic Strategies
- Positioning is Key: Due to its slow movement and long reload times, you’ll need to position yourself wisely. Stay at a distance and focus on consistent long-range damage, especially with Piercing and Spread ammo.
- Defensive Play: Make use of the auto guard and perfect guard mechanics. These allow you to tank hits while dealing damage. However, the key here is knowing when to switch between defensive and offensive stances—don’t get too close to monsters!
- Ignition Mode: Switching to Ignition Mode adds a whole new level to your combat strategy. Choose between aggressive or defensive special ammo based on your needs in a fight. For more damage, go with Wyvern Heart; for more control, try Wyvern Piercer.
- Ammo Management: Keep track of your ammo and reload times. Some ammo types take longer to reload than others, so ensure you’re prepared for those longer animations by positioning yourself correctly before reloading.
- Cooperative Play: The Heavy Bow Gun can be extremely effective in multiplayer, as you can focus on dealing damage from afar while providing defensive support to your teammates. Be mindful of using recovery ammo when necessary to support your team.
Final Tips for Heavy Bow Gun Players
- Reload Efficiency: Some ammo types have longer reload times, so always be mindful of when to reload. Long reloads can leave you vulnerable if you’re not careful with positioning.
- Use the Correct Ammo for the Job: Different ammo types are better suited to different monsters. Always be sure to check your ammo loadout before each hunt and adjust based on the monster you’re facing.
- Combo with Other Players: While you can take on monsters solo, the Heavy Bow Gun shines in cooperative play. Use your long-range capabilities to support your team and make use of your powerful Special Ammo for big damage spikes.
- Master the Ignition Mode: Ignition Mode isn’t just about dealing damage—it’s about versatility. Experiment with different Special Ammo options to find what suits your playstyle. Sometimes, a more defensive approach with Wyvern Counter can be just as rewarding as an all-out offensive strategy.
Bow
The Bow in Monster Hunter Wilds is a unique ranged weapon, distinguished from others by its reliance on stamina rather than ammunition. While it may seem straightforward at first, mastering the Bow requires a deep understanding of its combos, coatings, and various mechanics. Whether you’re a newcomer or a seasoned veteran returning to the game, this guide will cover everything you need to know about the Bow, its changes in Monster Hunter Wilds, and tips for maximizing your performance.
The Basics: Getting Started with the Bow
The Bow is one of three ranged weapons in Monster Hunter Wilds, and it stands out because it uses stamina instead of traditional ammunition. This allows you to unleash an endless barrage of arrows on your target, but at the cost of managing your stamina and the Trick Arrow gauge effectively.
For newcomers, the Bow is easy to pick up but requires patience and practice to master. You’ll need to learn the best combinations of combos, coatings, and how to handle different monsters.
Key Combos for the Bow
Unlike melee weapons, the Bow offers several unique combos. These don’t follow a traditional chain of attacks but instead offer a starter attack with a variety of finishers. Here are the most essential combos to get you started:
- Dragon Piercer: The Dragon Piercer is a powerful shot that pierces through the length of the monster’s body.
- How to Perform:
- Hold right trigger and release, then press B twice, followed by Y + B (Xbox) or Circle + Circle + Triangle + Circle (PlayStation).
- Hold right trigger and release, then press B twice, followed by Y + B (Xbox) or Circle + Circle + Triangle + Circle (PlayStation).
- How to Perform:
- Thousand Dragons: This attack shoots multiple arrows in a wide area, unlike the single arrow of the Dragon Piercer.
- How to Perform:
- Hold right trigger and release, then press B twice, followed by Right Trigger + Y + B simultaneously (Xbox) or R2 + Triangle + Circle + R2 (PlayStation).
- Hold right trigger and release, then press B twice, followed by Right Trigger + Y + B simultaneously (Xbox) or R2 + Triangle + Circle + R2 (PlayStation).
- How to Perform:
- Tracer Shot Combo: This new addition in Monster Hunter Wilds allows you to fire a tracer arrow that will home in on the target.
- How to Perform:
- Hold right trigger, press X, then press B twice and Y (Xbox) or R2 + Square, Circle + Triangle (PlayStation) during a charging side step.
- Hold right trigger, press X, then press B twice and Y (Xbox) or R2 + Square, Circle + Triangle (PlayStation) during a charging side step.
- How to Perform:
- Arc Shot: This powerful combo rains down arrows on the target, some of which will become lingering fuse arrows.
- How to Perform:
- Press left and right trigger + B, followed by Y during a charging side step, then Y + B (Xbox) or R2 + L2 + Circle, followed by Triangle + Circle (PlayStation).
- How to Perform:
Changes and Updates in Monster Hunter Wilds
The Bow has seen some major changes in Monster Hunter Wilds, making it a more versatile weapon with greater potential for damage and playstyle customization. Here are the key updates:
Coatings Reworked:
Coatings now function differently in Monster Hunter Wilds. Instead of crafting them, they are applied using the Trick Arrow gauge. There are eight coatings to choose from, and they provide different effects:
- Power Coating: Increases damage.
- Pierce Coating: For piercing shots.
- Close-Range Coating: Enhances short-range shots.
- Status Effect Coatings: Includes poison, sleep, paralysis, exhaust, and blast.
For instance, the Hope Bow can use Power and Poison coatings, adding more flexibility to your attacks. Keep in mind that coatings are now limited by your Trick Arrow gauge, so you’ll need to manage this resource carefully to maximize your effectiveness.
Tracer Arrows:
One of the most exciting additions is the Tracer Arrow, which attaches to the monster, causing all subsequent shots—regardless of the type—to home in on it. The Tracer Arrow boosts your effective range and increases damage per arrow.
- How to Use: After applying a tracer arrow, all your arrows will home in on the target, enhancing your damage output.
Discerning Dodge:
This new mechanic allows you to dodge just as the monster attacks. If you time it right, you’ll activate iframes (invincibility frames), and you’ll receive a boost to both stamina and the Trick Arrow gauge. This feature makes the Bow more mobile and responsive.
Advanced Mechanics and Techniques
- Flying Swallow Shot: The Flying Swallow Shot adds mobility and utility to the Bow. You can hop cancel out of a side step while shooting multiple arrows.
- How to Perform:
- Press Left Trigger + Y (Xbox) or L2 + Triangle (PlayStation) during a charging side step. This helps you dodge incoming attacks while continuing to fire arrows, especially when paired with a Tracer Arrow.
- Press Left Trigger + Y (Xbox) or L2 + Triangle (PlayStation) during a charging side step. This helps you dodge incoming attacks while continuing to fire arrows, especially when paired with a Tracer Arrow.
- How to Perform:
- Arc Shot Rework: The Arc Shot, a fan-favorite, no longer deals stun damage or provides buffs. Instead, it now allows you to charge the attack up to three levels, increasing the number of arrows that rain down. Additionally, it leaves lingering arrows on the target, which can be detonated using other shots, such as the Dragon Piercer or Thousand Dragons.
- Instant Dragon Piercer: A faster variant of the Dragon Piercer, this version takes about half the time to charge and deals half the damage. It’s the quickest way to detonate lingering bombs from Arc Shot and can deal massive damage if timed correctly.
- Focus Strike – Hail Storm: The Focus Strike, called Hail Storm, can trigger massive damage by detonating Tracer Arrows and lingering Arc Shot bombs. This move is powerful when combined with the Dragon Piercer, especially when used to target specific wounds on the monster.
Tips for Mastery
- Resource Management: The Bow is heavily reliant on managing stamina and the Trick Arrow gauge. Overusing coatings or Tracer Arrows can quickly drain your resources, leaving you vulnerable. Always keep an eye on your resources and plan your attacks accordingly.
- Optimal Range: The Bow is most effective at mid-range. Learn to stay within this range, as this is where your arrows will hit the hardest. The addition of Tracer Arrows and the ability to dodge and move around the monster only enhance your effectiveness.
- Combo Synergy: Make sure to combine different attacks for maximum damage. The Dragon Piercer can trigger lingering bombs from Arc Shot, while Thousand Dragons can spread out damage and pair well with Tracer Arrows for even more impact.
- Complementary Weapons: For Bow mains, the Light Bowgun is an excellent secondary weapon. It provides additional status effects and helps keep monsters at a distance. If you’re looking for more damage, the Heavy Bowgun offers powerful shots like Sticky Ammo and Slicer Ammo. The Hunting Horn can also be a good choice for providing buffs, especially during solo hunts.